Bravia Setup🎉
Version 2.1 - 01/25/25StepsNotes...Usage
Version 2.1 - 01/25/25
Summary: This document covers the setup of a Bravia professional display
Format a usb thumb drive to FAT32 and extract the contents of this zip file onto the root of the newly formatted drive.
Step 1: Activating Display Management Software
- Power on the display after confirming network connection is working. Ethernet only
- Go thru the initial setup steps until you arrive at the home screen (looks like Chromecast)
- Update the system software via the TV menu
- After the TV restarts stick the thumb drive in USB port 1 (closest to the front of the display).
- Perform a factory reset
- Follow all the prompts on screen, select Yes, allow, ok etc. the display will eventually reach a point showing an activation code. Please call 1-888-881-0638 opt 1 and give the support agent the position of the display (Left, Middle, Right etc.), the displayed activation code, and the address you are at.
- Remove the USB drive from the display
Step 2: Enable Pro Mode
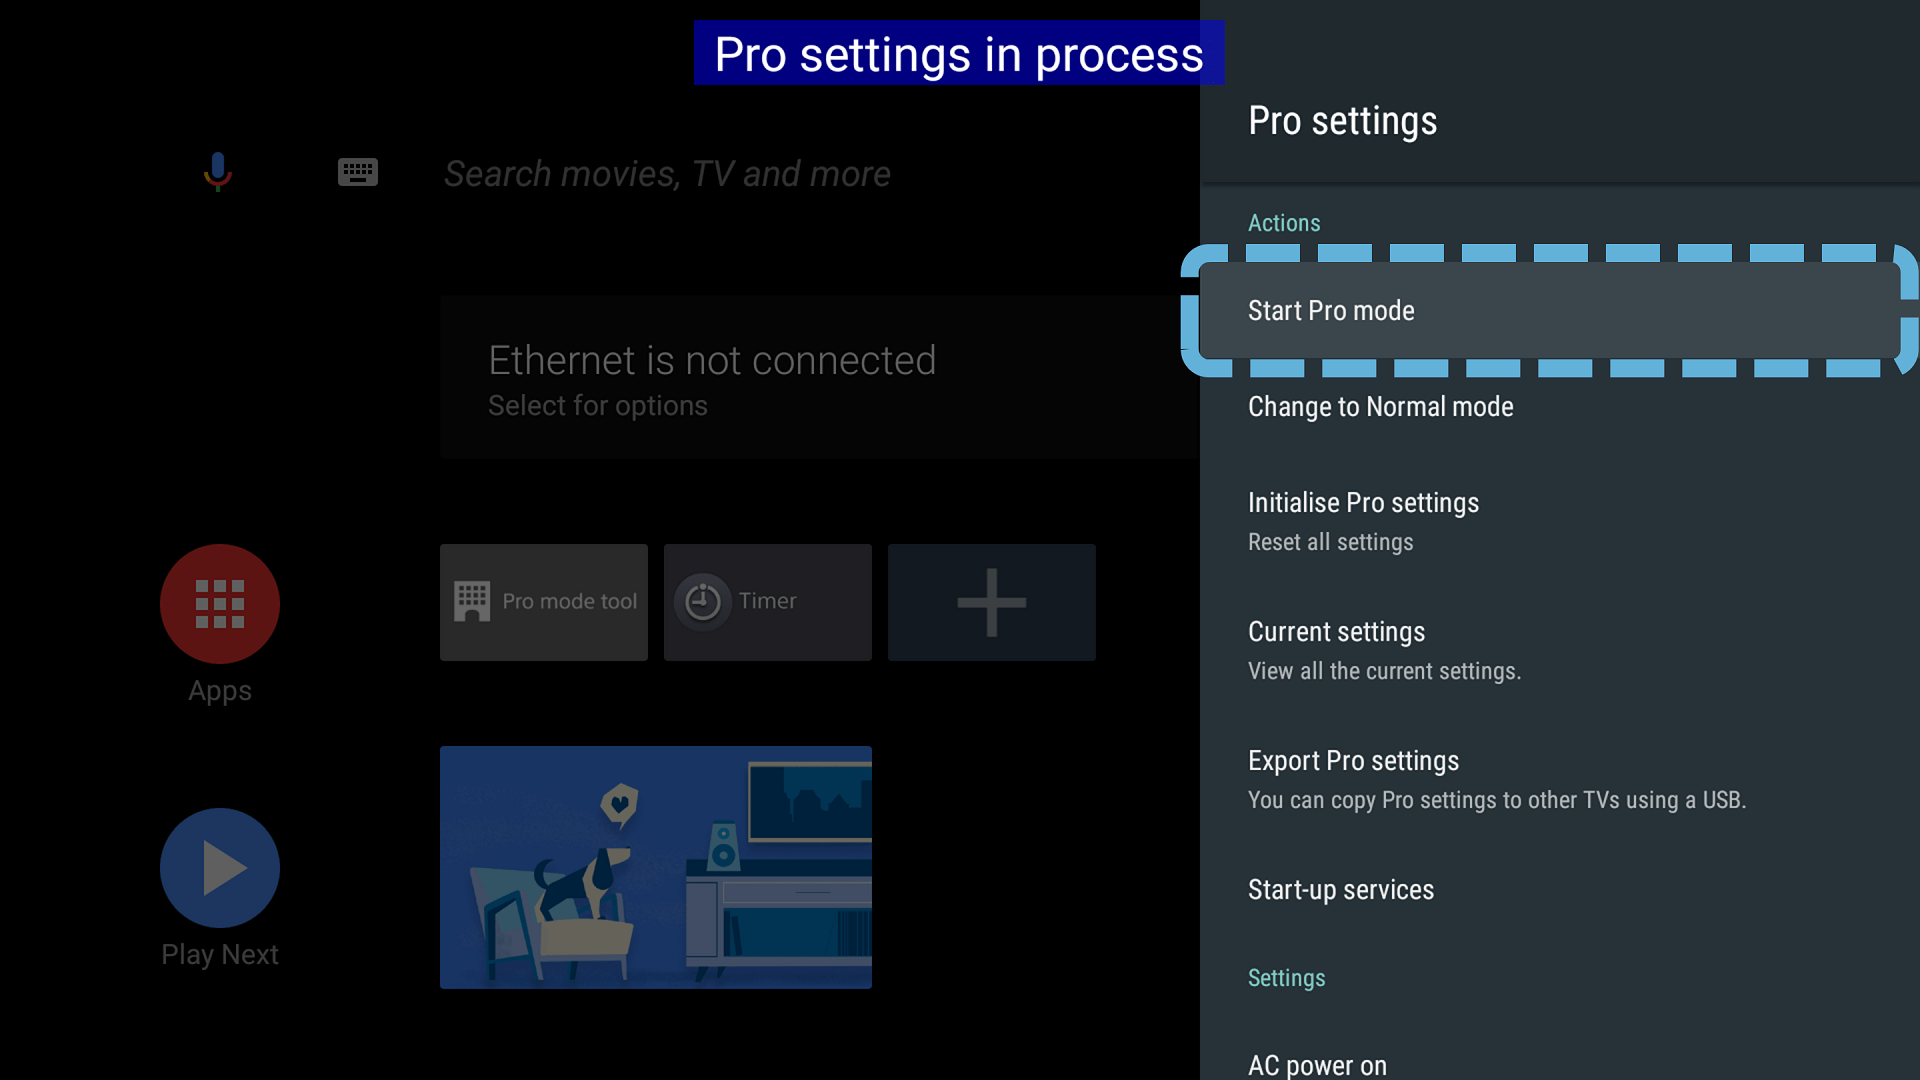
- Open Pro Settings Application
- Press OK or Allow on any pop up buttons that appear on screen.
- Enable all options under USB Autorun
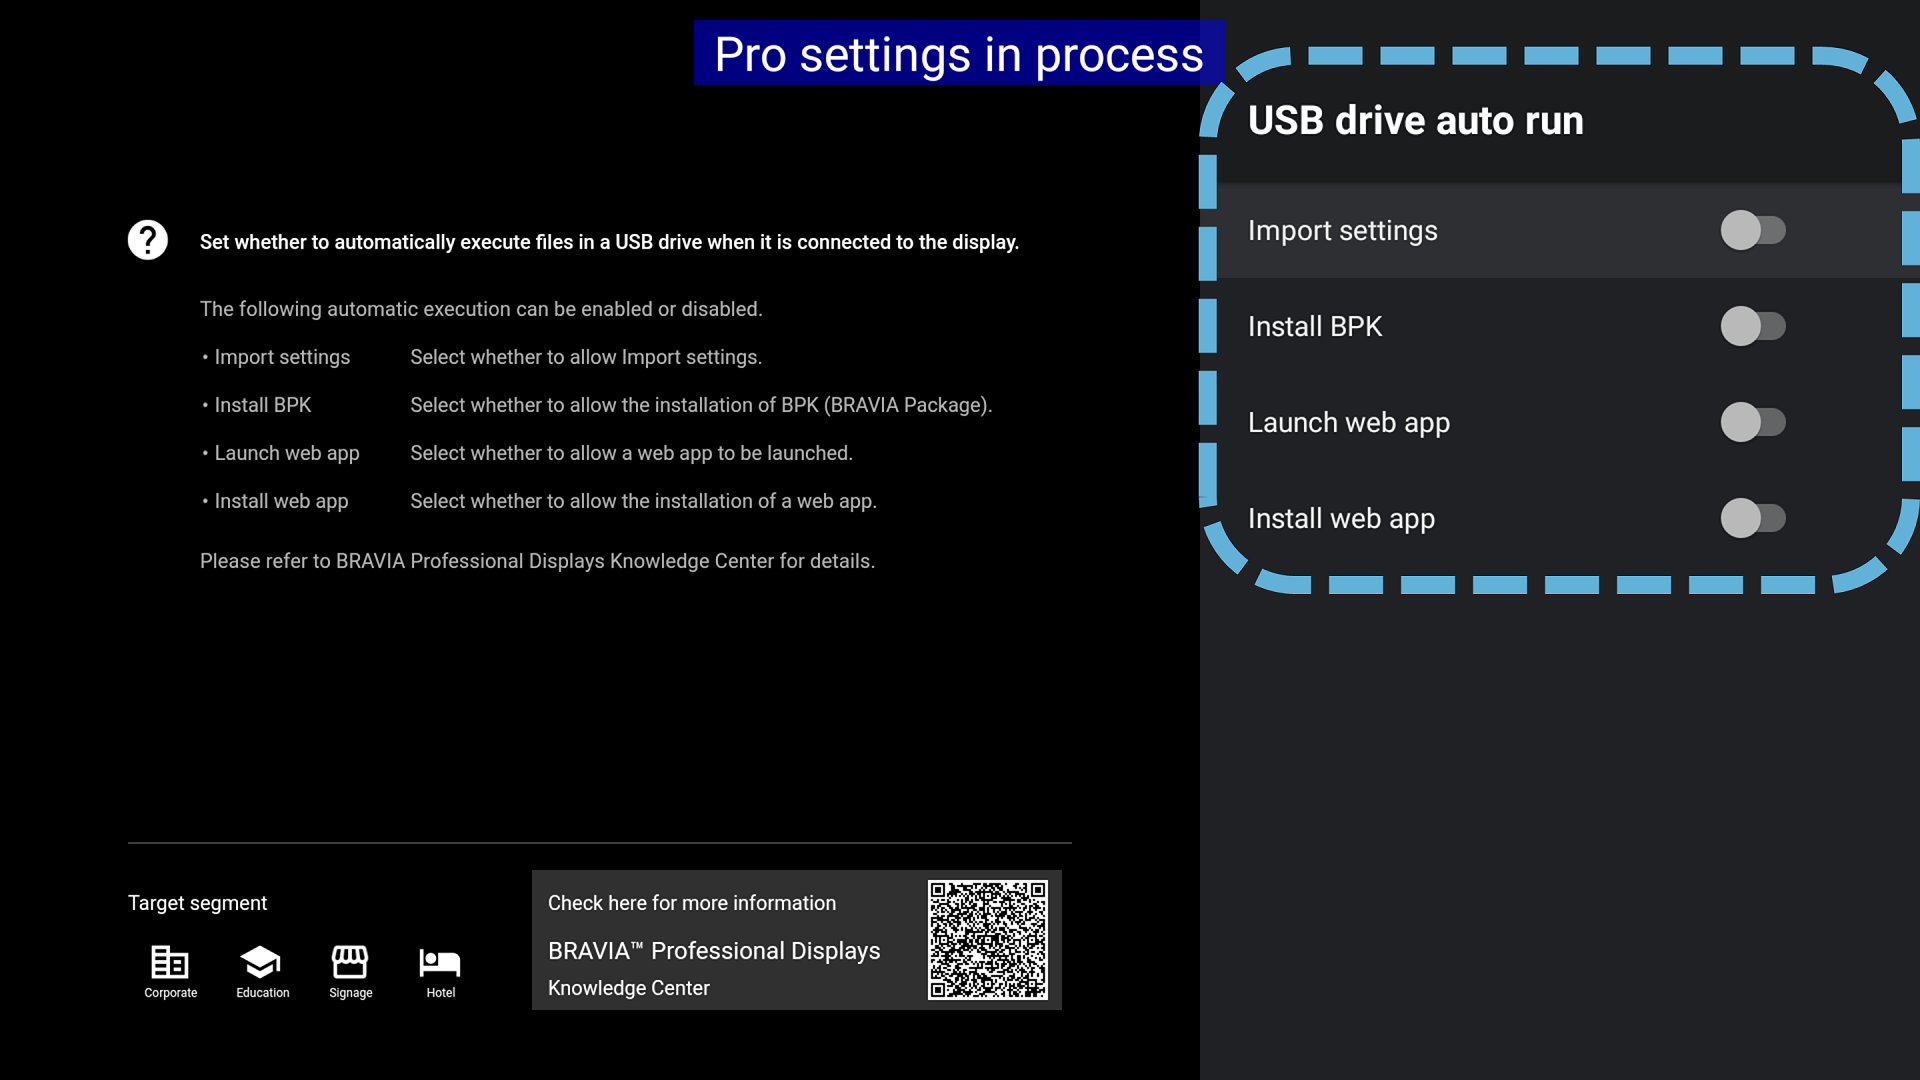
- Insert the USB Drive in the USB 3.0 (blue) connector. In usb port 1. This port is closest to the display surface
- You will be prompted to import settings found on USB device. Click Import Settings. The display will restart then enter pro mode settings again and select Start Pro Mode
- Select the function, Start Pro Mode
- Notification appears. Select OK to proceed.
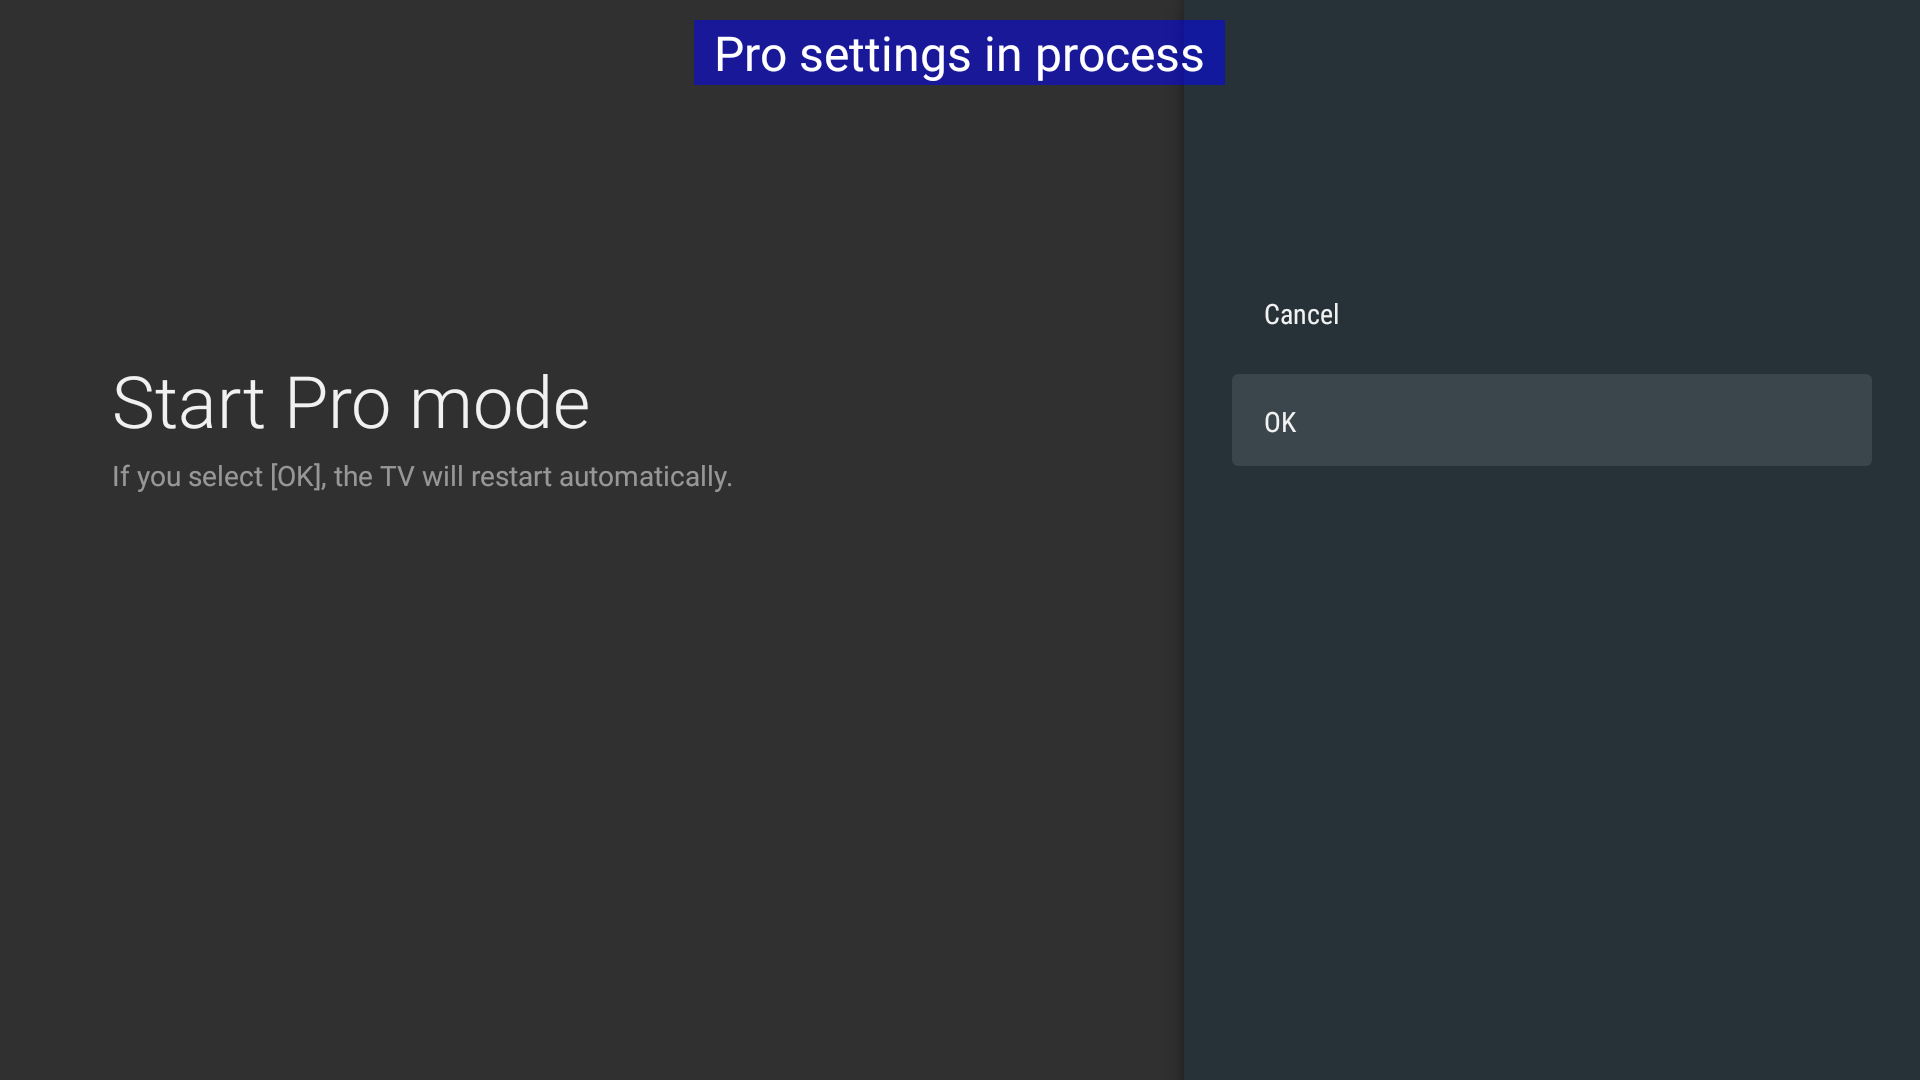
- Setting is complete. The display will reboot and switch to Pro mode.

The display will restart and when it reloads you will be in Pro Mode and your display is now ready for use. You may now move on to the EDID pairing with the media player.
Please visit https://support.10net.net/activation for the Media Player setup
Common Problems
1) Menu Locked Down
If you are unable to access functions such as settings and other applications, it is likely that your display is stuck in pro-mode. To exit pro mode, follow these instructions:
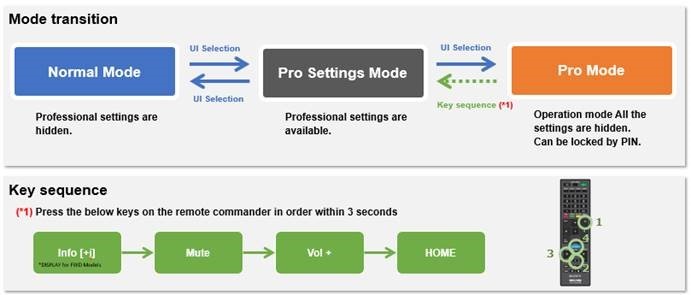
You will now be able to access Pro Settings Mode.
2) Factory Reset with the USB drive plugged in does not install Sony DMP app.
The most common problem with USB drive issues on these monitors is due to partition type. It must be FAT32. Fort simplicity using a 4GB flash drive will force windows to format as FAT32.
3) There is a white font with blue background across the of the display saying pro settings in progress and it doesn't go away
To remedy this select "Start Pro Mode" from the menu